

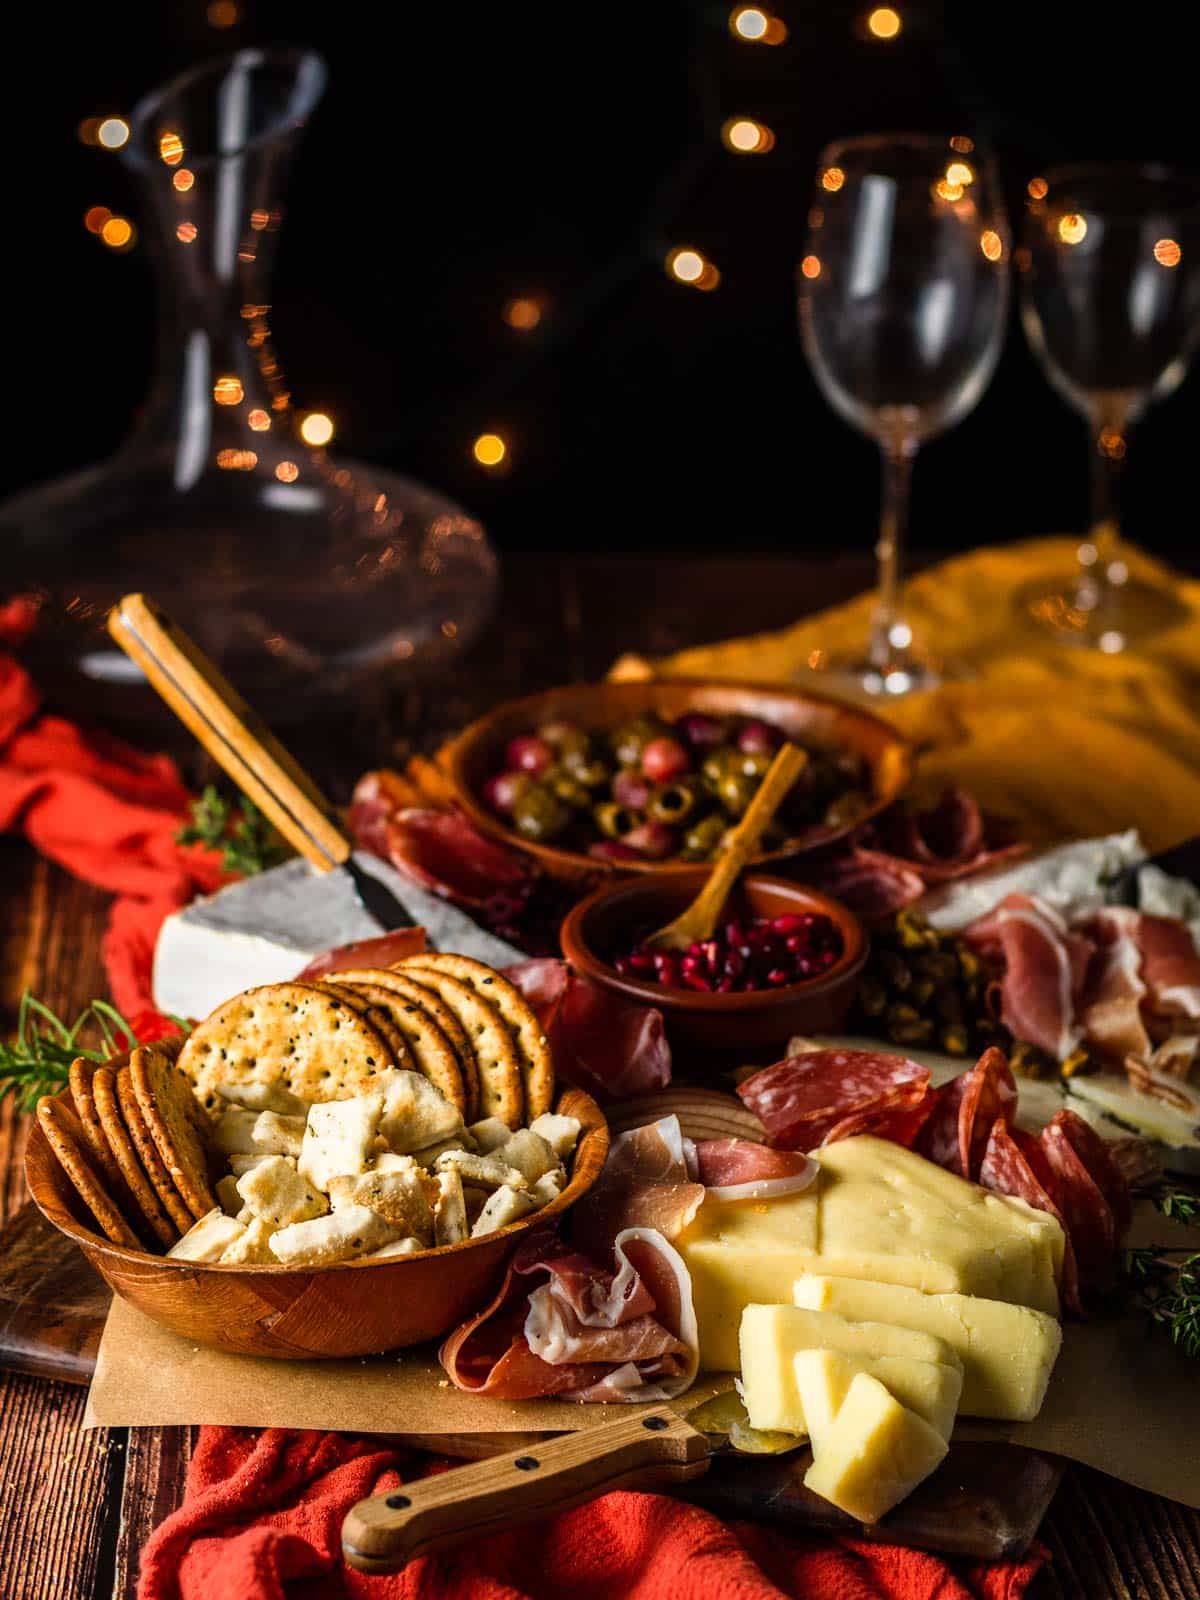
Learn how to assemble a charcuterie board like a pro by using these simple step by step instructions. Pick out your favorite meats and cheeses and then follow this easy beginner's guide for effortless entertaining.
This post was originally published in November 2019 and has been updated for content.
Charcuterie is a French word that dates back to the 15th century. It's a branch of cooking devoted to preparing meat products. It has evolved into a term for a meat and cheese board that is served as an appetizer.
Whether it's an elaborate holiday dinner or a Friday night with friends, a charcuterie board is a great way to add a simple appetizer to special occasions. It's versatile, takes minimal effort, and can be customized to the season, holiday, or preferences of your guests.
A simple charcuterie board is the perfect appetizer to go with Italian rice balls and short rib ragu for Sunday dinner. Make a more elaborate charcuterie board for grazing before a big holiday meal. You can even make a small charcuterie board for date night along with Italian sangria!
Jump to:
🧀 Ingredient notes
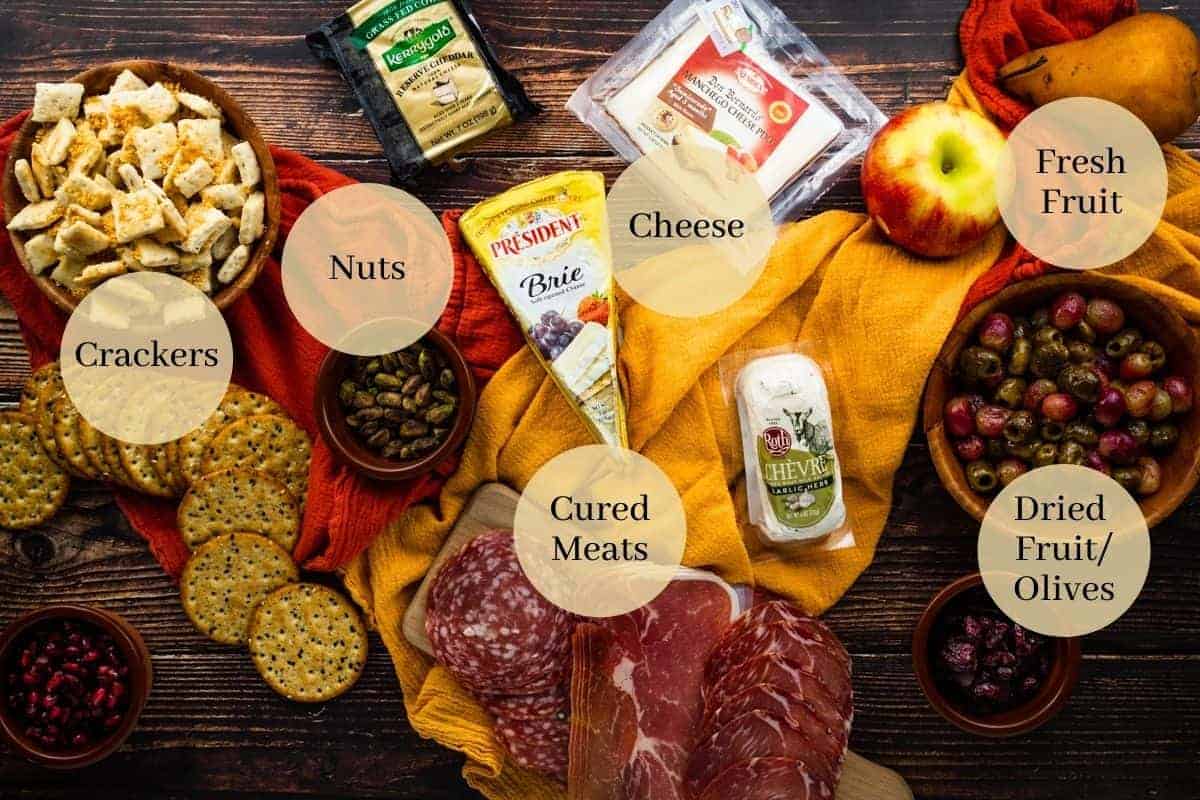
- Meats - Cured meats such as genoa salami, pepperoni, spicy cappicola, or prosciutto are typical on a charcuterie board. Any variety of meats can be used. Use 1-3 different types of deli meats, with one maybe being more mild and one more strongly flavored or spicy. You can also add things like summer sausage or other cured sausages to the mix. Make sure to ask the deli at your local grocery store to slice the meat thinly so it is easy to assemble and serve.
- Cheeses - Get a mix of 2-4 different types of cheese when making a charcuterie board. Grab a variety of soft cheese and hard cheeses that are both strong and mild in flavor. Goat cheese, baked brie, blue cheese, manchego cheese, cheddar cheese, and Havarti cheese are some of my favorite cheeses to serve. Italian cheeses like asiago, fontina or even burrata are also excellent. You can add slices of cheese or use cheese knives so guests can cut pieces themselves.
- Fruit - Use a mix of dried fruits along with fresh fruit or preserves when building your board. Fresh figs, apricots, or cranberries go along well with freshly sliced pears, apple slices, orange wedges, or bunches of fresh grapes. Serve jam or fruit chutney in small bowls to spread on crackers or bread. I like adding a batch of grapes and olives or tomato bacon jam for sweet and salty components.
- Crackers - Serve any crackers or sliced bread as an accompaniment to your board. You can make rosemary crackers or slice up a baguette of your favorite crusty bread.
- Extras - Fill in your board with extra savory or sweet items that vary in texture. Olive tapenade, honey, salted nuts like pistachios or almonds, roasted peppers, pomegranate seeds, or small pickles are other great additions. Add some decorative elements by adding sprigs of fresh herbs.
📋 Substitutions and variations
- Vegetarian - A traditional charcuterie board includes sliced cured meats. To make a vegetarian cheese platter, omit the sliced meat. Select a variety of cheeses to serve along with crackers, bread, fruit, nuts, olives, or spreads.
- Themed - Your charcuterie platter can be themed toward the type of event, season, or holiday you are celebrating. Choose seasonal items that are available during the time of year. Persimmons or pomegranates are great during fall or winter, spiced nuts during the holiday season, or fresh berries during the summer. Serve your board in the shape of different seasonal items such as Christmas trees, Easter eggs, or Thanksgiving turkeys! Take a look at some of these unique charcuterie board ideas that are great for the holidays and other special events.
- For Kids - Consider cubing the cheeses and serving milder tasting meats to make the board kid friendly.
🍽 Serving suggestions
Board - Don't feel like you need to have a big fancy board or large platter for your charcuterie. You can use a cutting board, a collection of smaller platters placed together or you can even set up your display on parchment paper right on the countertop.
Quantities - Depending on your number of guests, plan on about 3-4 ounces of combined meat and cheese per person on your charcuterie board when serving it alongside other appetizers. For a main course, increase the quantities to 6-8 ounces per person.
Serving - For the perfect charcuterie board, make sure to serve items that are easy to grab, easy to eat, and don't make too much of a mess. The goal is simplicity so you all can enjoy your time talking and spending time with each other. Make sure to include tongs, forks, toothpicks, spoons, or knives to easily serve the items on the board.
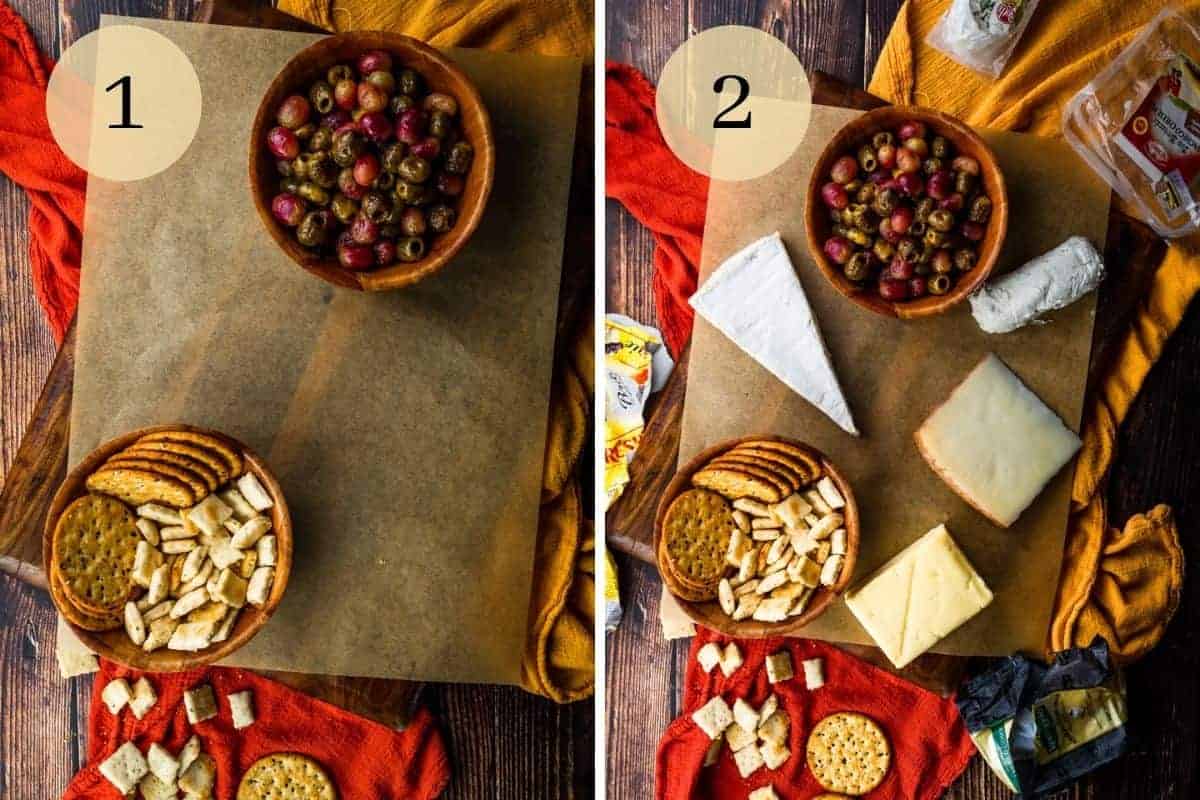
🔪 Step by step instructions
First, find a large board or platter to serve as your base, and then add a couple of platters or containers. Fill the containers with items that contain liquid or things that will get soggy.
Next, evenly distribute the selection of cheeses around the board. Make sure to leave room for people to slice and serve.
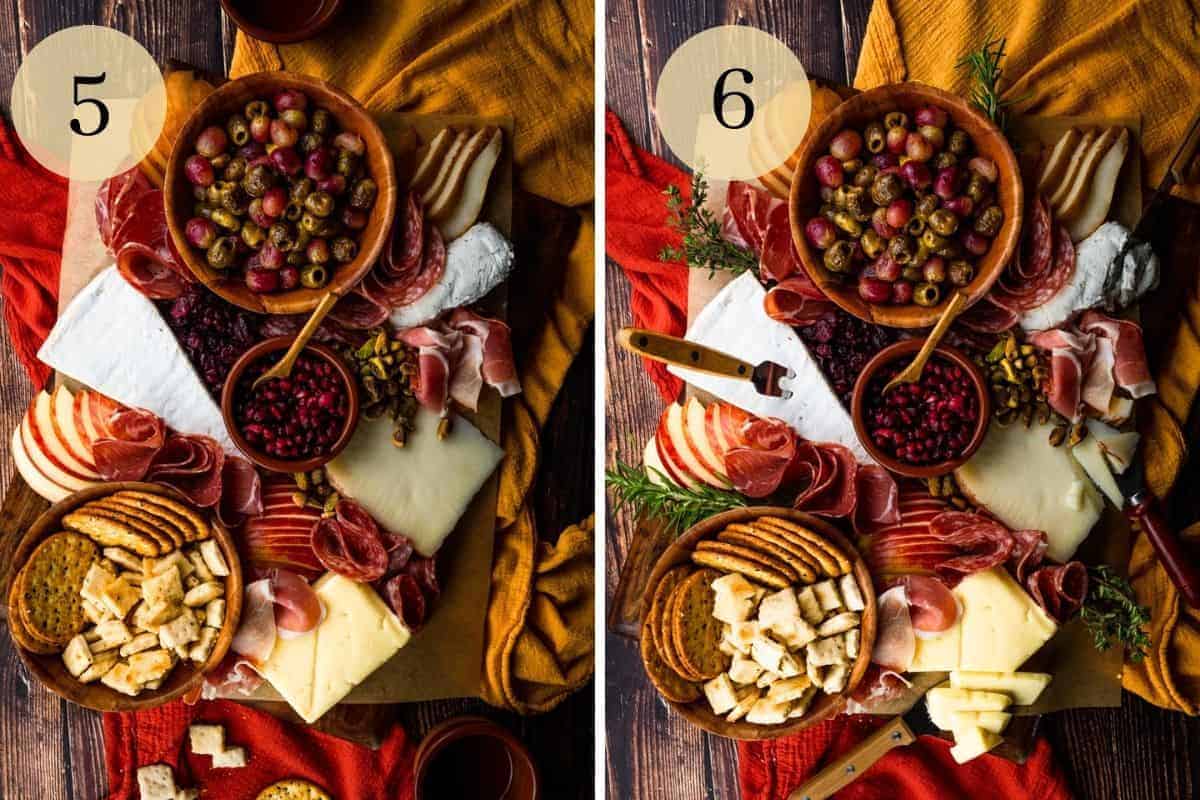
Cut fresh fruit into slices and then arrange them next to the cheese. Fold or bunch up the sliced meat into different shapes for easy grabbing. Tuck them into spots around the cheeses and fruit.
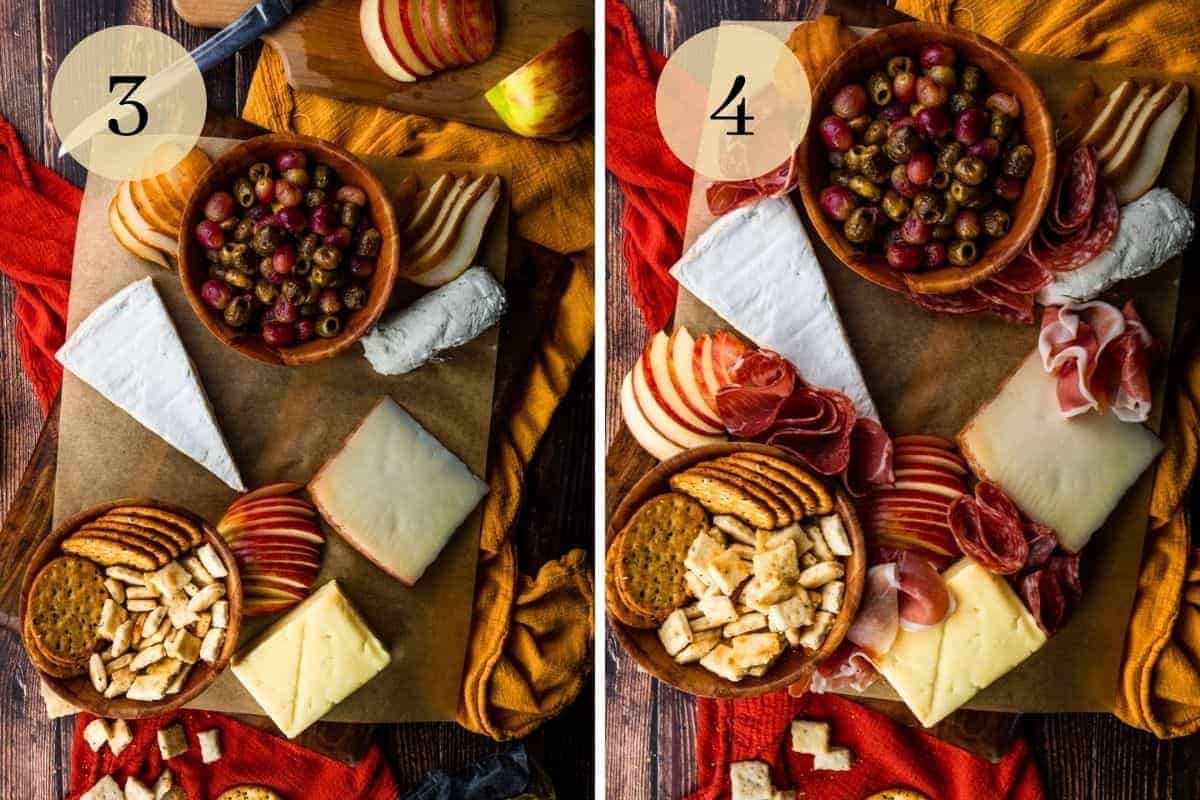
The last step is to fill in any remaining space with dried fruit, nuts, or any other smaller items. Once everything is on the board, items can be adjusted to make sure there are no empty spots and that everything is easily accessible.
If you ever don't recognize a tool or skill that is mentioned, be sure to look it up in our Glossary of Cooking Terms and Definitions for more information.
⭐ Expert tips
- Don't feel like you need to buy the most expensive meats and cheeses. Boards can be built with just a few inexpensive items.
- Use a good selection of sweet and savory items along with both strong and mild flavors and a variety of different textures.
- Place items with liquid such as olives or fruit spreads in separate containers so they don't leak onto the other items.
- Place bread and crackers on a tray or in a bowl to prevent them from getting soggy.
- Add cheese knives or servers to the board for people to serve themselves. I like to pre-slice a couple of portions to get it started.
- Don't let the board sit out for longer than 2 hours to avoid spoilage. If it's a warm day, no more than 60-90 minutes.
⏲️ Make ahead instructions
A charcuterie board is a great make-ahead appetizer. With the exception of the sliced fresh fruit, everything can be prepared and set up on the board ahead of time. Wrap the board in plastic wrap and store it in the refrigerator up to 24 hours ahead of time. When it's time to serve it, remove the plastic wrap and add the sliced fresh fruit.
🥡 Storage suggestions
If the board hasn't been sitting out at room temperature longer than 2 hours, leftover meats and cheeses can be wrapped up individually and stored in the refrigerator for eating later. If the board has been sitting out for 2 hours or longer, then it's best to discard the items.
🍇 More appetizer recipes
If you loved learning how to make a charcuterie board, then check out these other easy appetizer recipes that I know you will love too!
- Loaded Blue Cheese Chips
- Easy Pepperoncini Dip with Bagel Chips
- Goat Cheese Puff Pastry Appetizer
- Bacon Wrapped Dates
📖 Recipe
How to Assemble a Charcuterie Board like a Pro
Ingredients
- ¼ pound hard sheep's milk cheese manchego or pecorino romano
- ½ pound soft creamy cow's milk cheese brie or camembert
- ⅓ pound semi-soft cow's milk cheese aged cheddar or gouda
- ⅓ pound soft semi-soft goat cheese chevre or drunken goat
- ¼ pound hot cappicola or pepperoni thinly sliced
- ¼ pound genoa salami or prosciutto thinly sliced
- dried apricots, figs or cranberries
- fresh pears, apples or grapes
- salted mixed nuts, almonds or pistachios
- roasted grapes and olives tomato bacon jam or fruit chutney/jam
- parmesan rosemary crackers store bought crackers or sliced crusty bread
- fresh herbs for garnish optional
Instructions
- Layout a large platter or cutting board for the base of the charcuterie board. If the surface or platter is not food safe, parchment paper can be placed on top.
- Place two smaller trays or containers in opposite corners on the board. Fill one of them with crackers or bread and the other with the roasted grapes and olives, jam, or chutney.
- Arrange the cheeses around the empty spaces on the board so they are spread out and not all in one place.
- Thinly slice the fresh fruit and arrange them next to the pieces of cheese.
- Fold the slices of meat into quarters or into small bunches and tuck them between the fruit, cheese and trays.
- Fill in any remaining spaces left on the tray with dried fruit and nuts.
- Make adjustments so there are no empty spaces and that all of the items are easily accessible.
- Garnish finished tray with fresh herbs, if desired.
Notes
- Meats - Use 1-3 different types of meat, making sure that one is milder and one is more strongly flavored or spicy.
- Cheeses - Use a mix of 2-4 different types of cheeses with a variety of both hard and soft, strong and mild, and different types.
- Fruit - Use a mix of dried, preserved, and fresh fruit. Jams or fruit chutneys can also be used to spread on crackers or bread.
- Crackers - Make homemade crackers, slice up a baguette of crusty bread, or buy assorted crackers at the store.
- Extras - Add olive tapenade, honey, salted nuts, roasted peppers, pomegranate seeds, or small pickles.
- Serving - A cutting board, a collection of smaller platters, or parchment paper on a countertop can be used instead of a large platter. Place bread and crackers on a tray or in a bowl so they don't get soggy. Provide cheese knives or servers and pre-slice a couple of portions. Don't let the board sit out for longer than 2 hours to avoid spoilage. If it's a warm day, no more than 60-90 minutes.
- Quantity - Plan on 3-4 ounces of combined meat and cheese per person for an appetizer and 6-8 ounces for a main course.
- Vegetarian - Omit the sliced meat and provide 3-5 selections of cheese along with crackers or bread, fruit, and extras such as nuts, olives, or spreads.
- Themed - Choose seasonal items that are available during the time of year. Serve your board in the shape of different seasonal items such as Christmas trees, Easter eggs, or Thanksgiving turkeys.
- For Kids - Cube the cheeses and serve milder-tasting meats.
- Make Ahead - Prepare the board with everything except the sliced fruit. Wrap the board in plastic wrap and store it in the refrigerator up to 24 hours ahead of time. When it's time to serve it, remove the plastic wrap and add the sliced fresh fruit.
- Leftovers - Leftover meats and cheeses can be wrapped up individually and stored in the refrigerator for eating later. If the board has been sitting out for 2 hours or longer, it's best to discard the items.


Jen Vinuya
This is great! Thanks for the tips!
Amanda
Absolutely, glad I could help.
Carmy
Obsessssed with charcuterie boards. Love all these tips!
Amanda
Same!!!
Toni
This is so perfect for holiday entertaining!
Amanda
I'm glad you enjoyed it!
Brianna
Used your tips to make a board for my book club and I got so many compliments!
Amanda
That's great to hear Brianna!
Jeri
Thanks for your great instructions on how to assemble a charcuterie board! I'm so excited to make one for the upcoming holidays!
Amanda
Yah!
Jessica
Thanks to your help my charcuterie board turned out perfect!
Amanda
So happy to hear this!
Colleen
We love charcuterie! Great tips!
Amanda
Thank you!
Karen
Did you treat the fresh fruit slices with anything to prevent them from browning ? If so, how far in advance from serving time can that be done ?
Amanda
I don't typically treat them with anything. Grapes and citrus will hold up relatively well in advance. Apples and pears will turn brown, so I try and wait till the last minute to cut them up and add them to the tray.
Addie
This is such a great post explaining charcuterie boards!
Amanda
I'm glad you found it helpful!
michele
Thanks for the tips! That's a beauty of a charcuterie board.
Amanda
Thank you, enjoy!
Oscar
I love a good charcuterie board but always have trouble assembling them. This post is so helpful. Thank you.
Amanda
I'm glad you found it helpful!
Lara
We’re making one for Fathers Day! Great inspiration here..thanks!
Amanda
That's great! Let me know how it turns out for you
Kayla DiMaggio
I love this! As someone who struggles with creativity when it comes to food placement, your tutorial on building the perfect charcuterie board was excellent! I am for sure coming back to this for my next party!
Amanda
I'm so glad you found this helpful!
Natalie
Oh my... this looks amazing. What a lovely combo of flavors. Perfect selection of cheeses as well. Thanks for this lovely idea!
Amanda
Of course! Feel free to switch up some of the cheeses or meats if you like to fit your preference.
Jeri
Great step-by-step instructions on assembling a Charcuterie board. Yours looks absolutely beautiful!
Amanda
Thank you so much, I hope you found it helpful!
Freya
Your tips helped me create the perfect charcuterie board for a small casual family gathering. They all loved it!
Amanda
I'm so glad you loved it. It's a great shareable appetizer!