


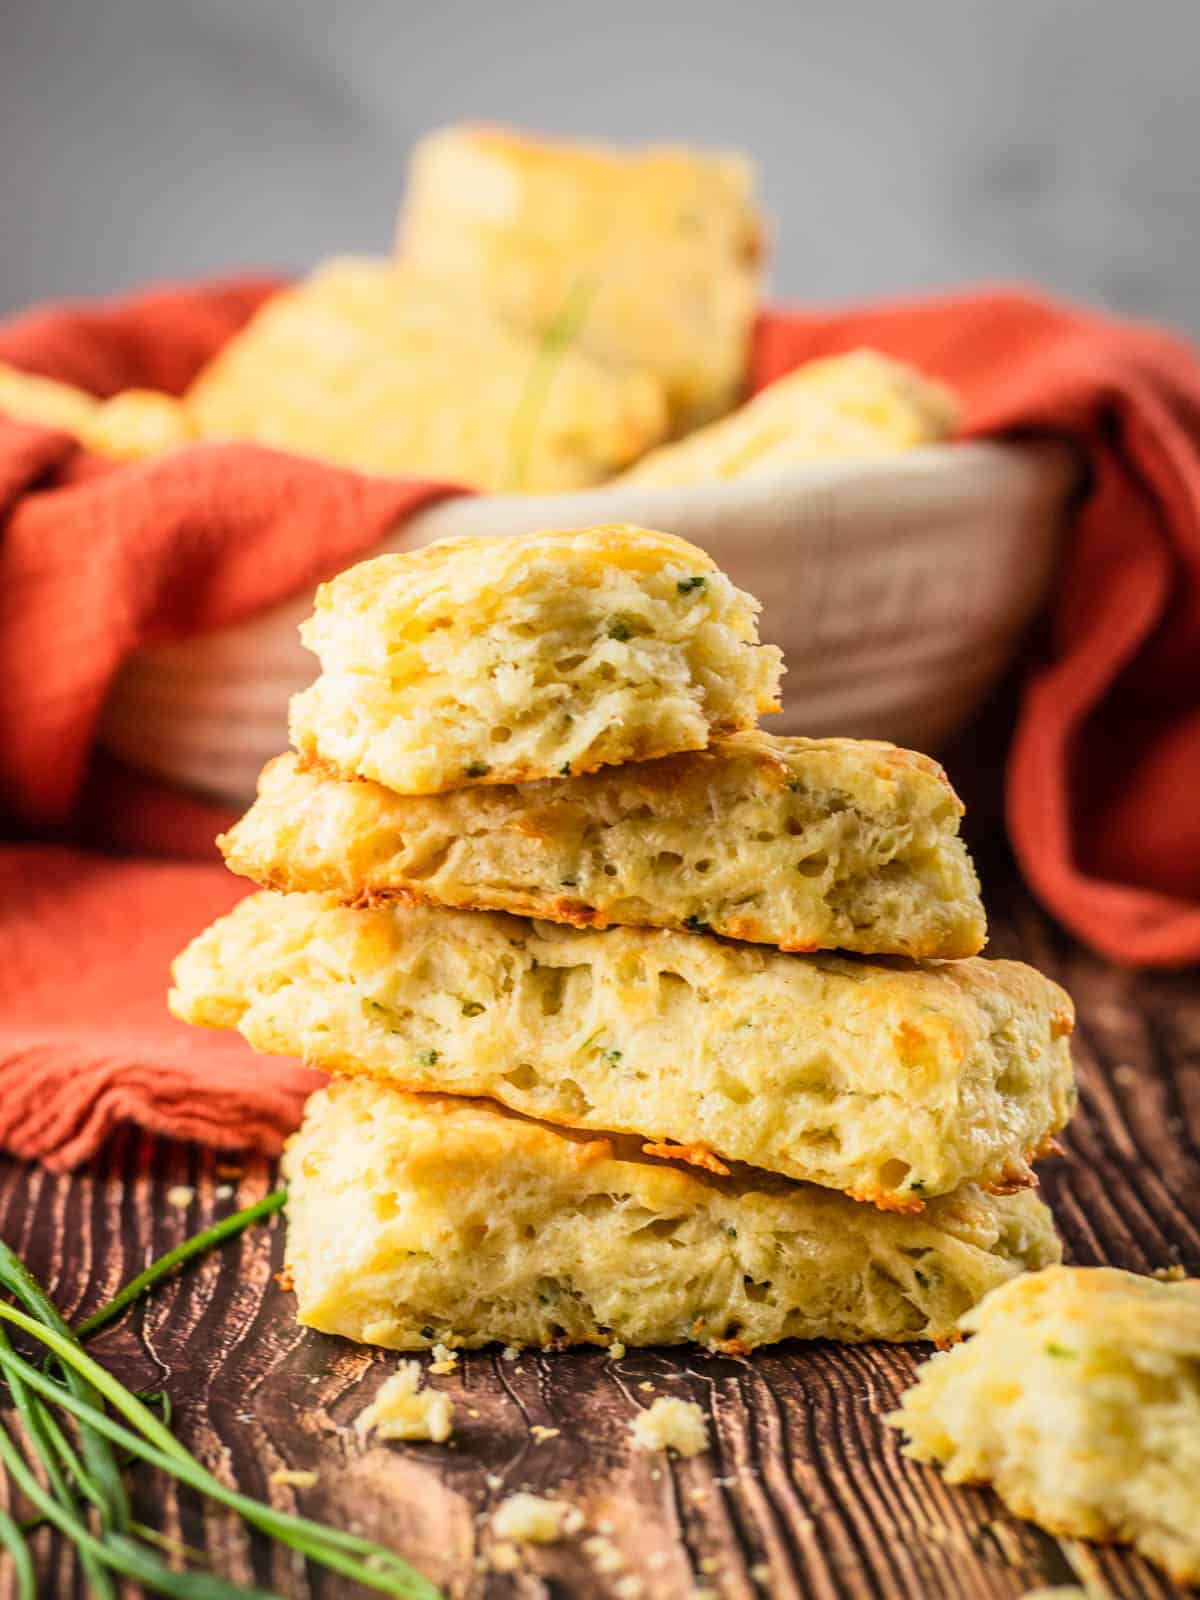
These fluffy cheddar chive biscuits are super flaky and don't use buttermilk. Filled with fresh chives and sharp white cheddar cheese, these savory biscuits are perfect for brunch or dinner.
This post was originally published in November 2020 and has been updated for content.
Homemade biscuits of all different varieties are a really special thing to make. They may seem tricky, but if you follow a few simple steps, you will be on your way to flaky biscuits in no time!
Serve these flaky cheddar chive biscuits with a bowl of minestrone soup, alongside a juicy roast chicken or even on top of chicken pot pie.
Jump to:
🧀 Ingredient notes
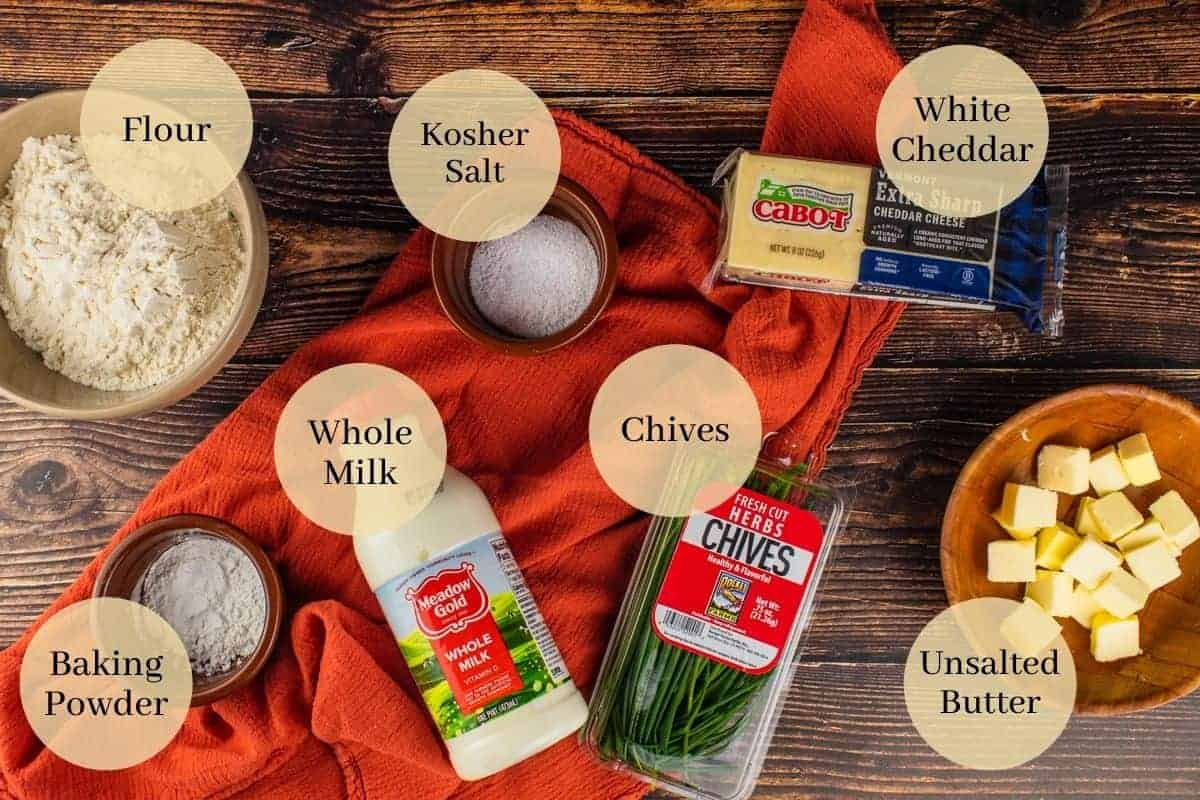
- Butter - It's important to make sure the butter stays VERY cold prior to mixing it into the dry ingredients. When the butter stays cold, it will melt properly during baking, making steam to create air pockets. This makes those desirable fluffy layers and extra flaky texture.
- Cheese - I love using sharp cheddar cheese for this recipe because it creates a nice flavor inside of the biscuits that pair well with the fresh chives. Regular cheddar cheese, gouda, or swiss cheese would also be great alternatives.
- Chives - Fresh chives have a very mild flavor that is reminiscent of both onions and garlic. It pairs very well with the white cheddar in this buttery biscuit. If fresh chives are unavailable, dried chives can also be used, or even sliced green onions.
📋 Substitutions and variations
- Bacon - Add crispy cooked pieces of bacon to the dough for an extra rich, savory biscuit.
- Gluten-Free - Replace the flour with a gluten-free cup for cup flour to make these biscuits gluten-free.
- Shape - For taller, fluffier biscuits, roll the dough thicker than one inch. Biscuits can be cut into circles or smaller squares if desired.
🥣 Step by step instructions
First, combine the flour, baking powder, and salt in a large bowl and use a whisk to mix the ingredients. Add in the cold butter and using a pastry cutter or fork, cut the butter into the flour mixture until it is crumbly.

Mix in the milk, cheddar cheese, and chives, stirring gently, until the dough just forms a ball. Turn the dough out onto a floured surface and press it gently into a rough circle shape. Cut the circle into four pieces that are roughly equal in shape and size.
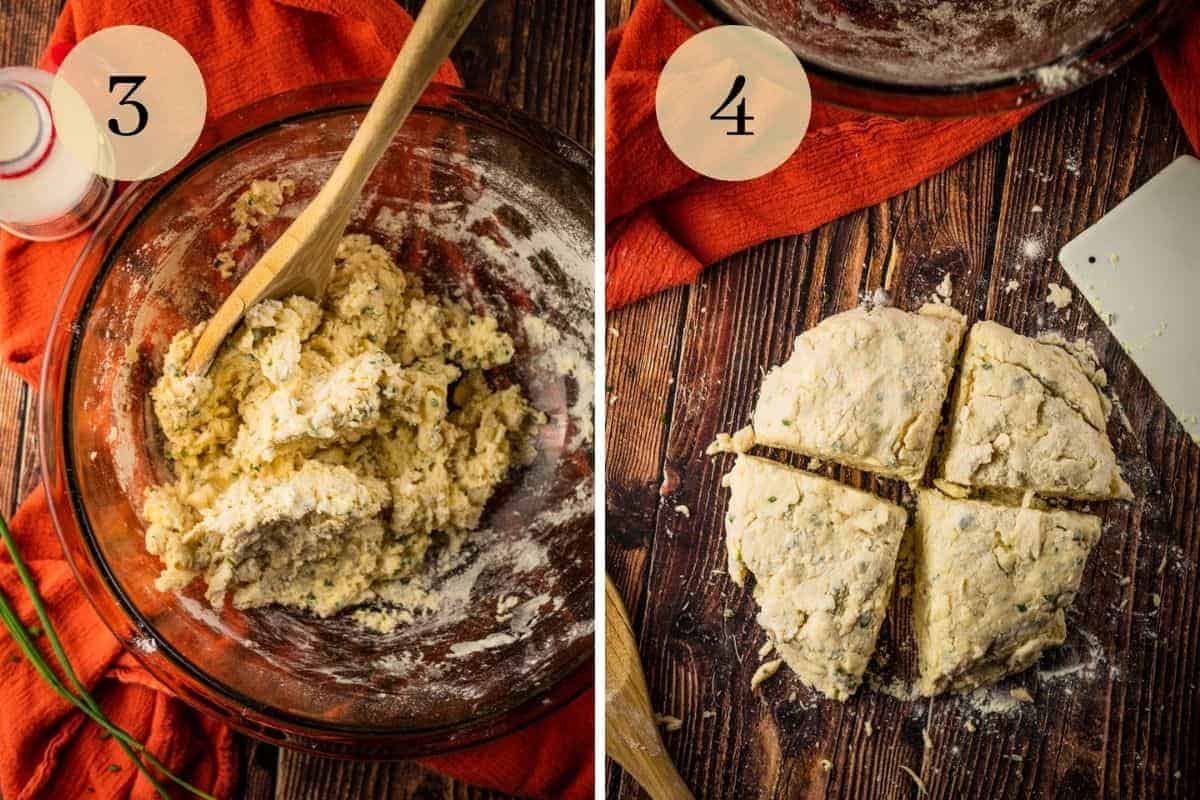
Stack the pieces on top of each other and gently press and roll the dough into a rough circle again using a rolling pin. Repeat this process one more time and then gently roll the dough into a rectangle shape that is approximately one-half to one inch thick.
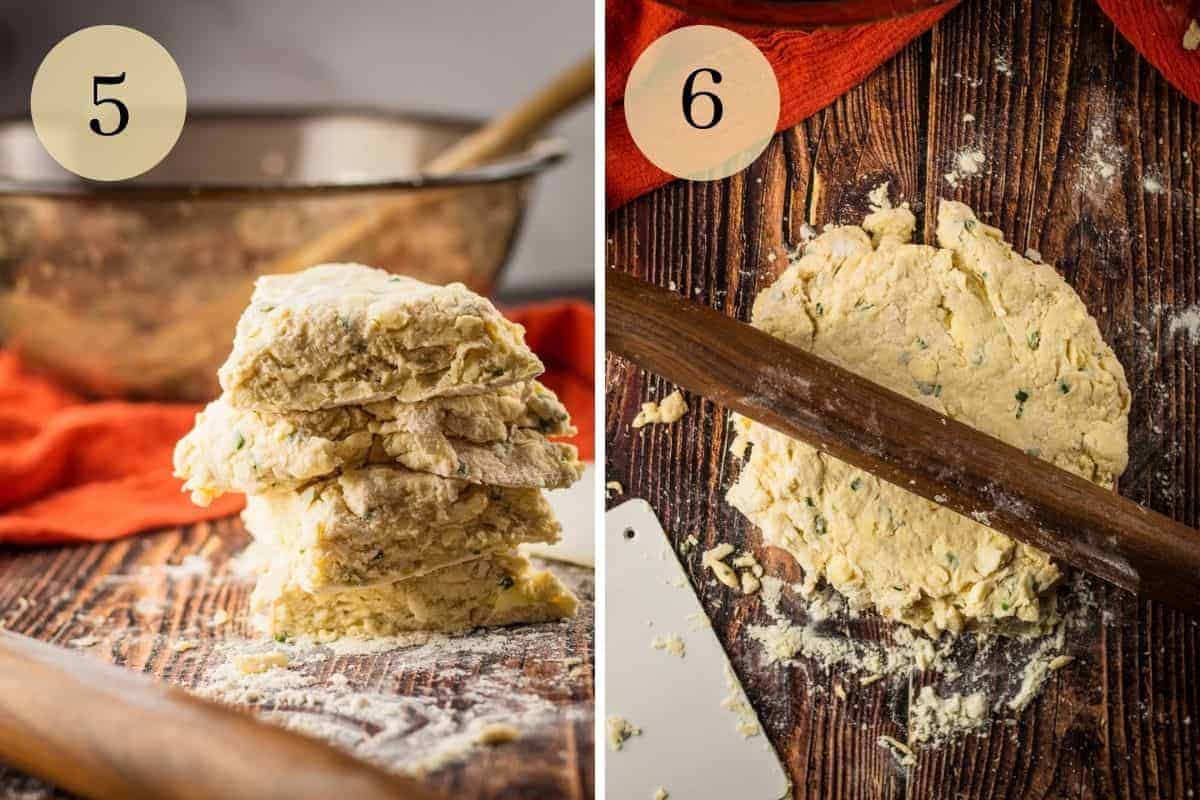
Cut the rectangle into eight smaller rectangles and place the biscuits on a sheet pan lined with parchment paper or foil. Place the sheet pan in the freezer for 5 minutes to chill the biscuit dough and then bake in a 400˚ oven for about 15 minutes till golden brown.

If you ever don't recognize a tool or skill that is mentioned, be sure to look it up in our Glossary of Cooking Terms and Definitions for more information.
⭐ Expert tips
- Store the butter cubes and milk in the fridge while you mix together the dry ingredients. It's important that they stay as cold as possible to create flaky layers.
- Don't skip placing the biscuits in the freezer for 5 minutes prior to baking. This will also ensure the dough stays chilled properly for a flaky, tender biscuit.
- Using a rolling pin instead of your hands to shape the dough will help make sure the dough stays chilled.
- Bake the cheddar chive biscuits until they are just golden brown and puffed up to prevent them from drying out.

⏲️ Make ahead instructions
These cheddar chive biscuits can be made and shaped ahead of time. Freeze the cut biscuits completely on a prepared baking sheet and then store them in an airtight container in the freezer for up the 2 months. Biscuits don't need to be thawed but can be cooked from frozen. Cooking times for frozen biscuits will be longer.
🥡 Storage suggestions
Leftover biscuits should be stored at room temperature in an airtight container and will keep for approximately 2-3 days.
🥣 More baking recipes
If you loved this recipe for easy cheddar chive biscuits, try these other baking recipes that I know you will love as well.
- Italian Pesto Bread
- Cinnamon Applesauce Muffins
- Greek Yogurt Banana Bread
- Blueberry Streusel Muffins
📖 Recipe

Fluffy Cheddar Chive Biscuits {No Buttermilk}
Ingredients
- 1 ⅔ cup all purpose flour
- 2 teaspoons baking powder
- 1 teaspoon kosher salt
- 6 Tablespoons unsalted butter cold and cut into small pieces
- ⅔ cup whole milk
- ½ cup shredded sharp white cheddar cheese
- 2 Tablespoons chopped fresh chives
Instructions
- Preheat the oven to 400° and line a baking sheet with parchment paper.
- In a large bowl, combine the flour, baking powder, and salt and whisk to combine and remove any lumps. Add in the cold butter pieces and using a pastry cutter or fork, cut the butter into the flour until they are crumbly and the size of peas.
- Add in the milk, cheese, and fresh chives and gently mix everything together until the dough just forms a ball.
- Turn the biscuit dough out onto a floured surface and shape it into a rough circle.
- Cut the circle into four pieces and stack the pieces on top of each other. Using a rolling pin, gently press down the pieces into a rough circle. Repeat this process one more time, then roll the circle into a rectangle shape that is ½ - 1 inch in thickness.
- Cut the dough into 8 rectangle biscuit shapes and place them on the prepared sheet pan. Place the sheet pan in the freezer for 5 minutes to chill the biscuit dough.
- Remove the biscuits from the freezer and place in preheated oven to bake for approximately 15 minutes until puffed up and golden brown.
Notes
- Store the butter cubes and milk in the fridge while the dry ingredients are mixed. It's important that they stay as cold as possible to create flaky layers.
- Don't skip placing the biscuits in the freezer for 5 minutes prior to baking. This will also ensure the dough stays chilled properly for a flaky, tender biscuit.
- Use a rolling pin instead of hands to shape the dough to help make sure the dough stays chilled.
- Bake the biscuits until they are just golden brown and puffed up to prevent them from drying out.
Substitutions and Variations
- Shape - Biscuits can be rolled thicker than one inch for taller fluffier biscuits and can be cut into rounds or smaller squares.
- Cheese - Regular cheddar cheese, gouda or swiss cheese would also be great alternatives.
- Chives - If fresh chives are unavailable, dried chives can also be used or even sliced green onions.
- Bacon - Add crispy cooked pieces of bacon for an extra rich, savory biscuit.
- Gluten Free - Replace the flour with a gluten free cup for cup flour to make these biscuits gluten free.


Tammy
Hello, Amanda! This looks great. Would these hold shape if cut in strips to make soft bread sticks? Or are they to soft of a crumb/crumbly?
Amanda
Thank you so much, I think they would be fantastic as breadsticks! As long as you make the maybe about 1 1/2 - 2 inches wide, I think they should hold up fine. Let me know how they turn out!