
Learn how to make a fun DIY sliced caramel apple bar! Served with all sorts of fun toppings, this make-your-own caramel apple bar is the perfect dessert station for Halloween and Fall.
This post was originally published in October 2017 and has been updated for content.
During the fall, our family loves eating caramel apples. The kids especially love all the fun toppings, but they can be super messy! This sliced caramel apple bar is a fun variation that is much easier to eat and clean up.
Serve this fun dessert station for Halloween with a big pot of three bean chili, chicago hot dogs and boozy bourbon apple cider!
Jump to:
🍎 Ingredient notes
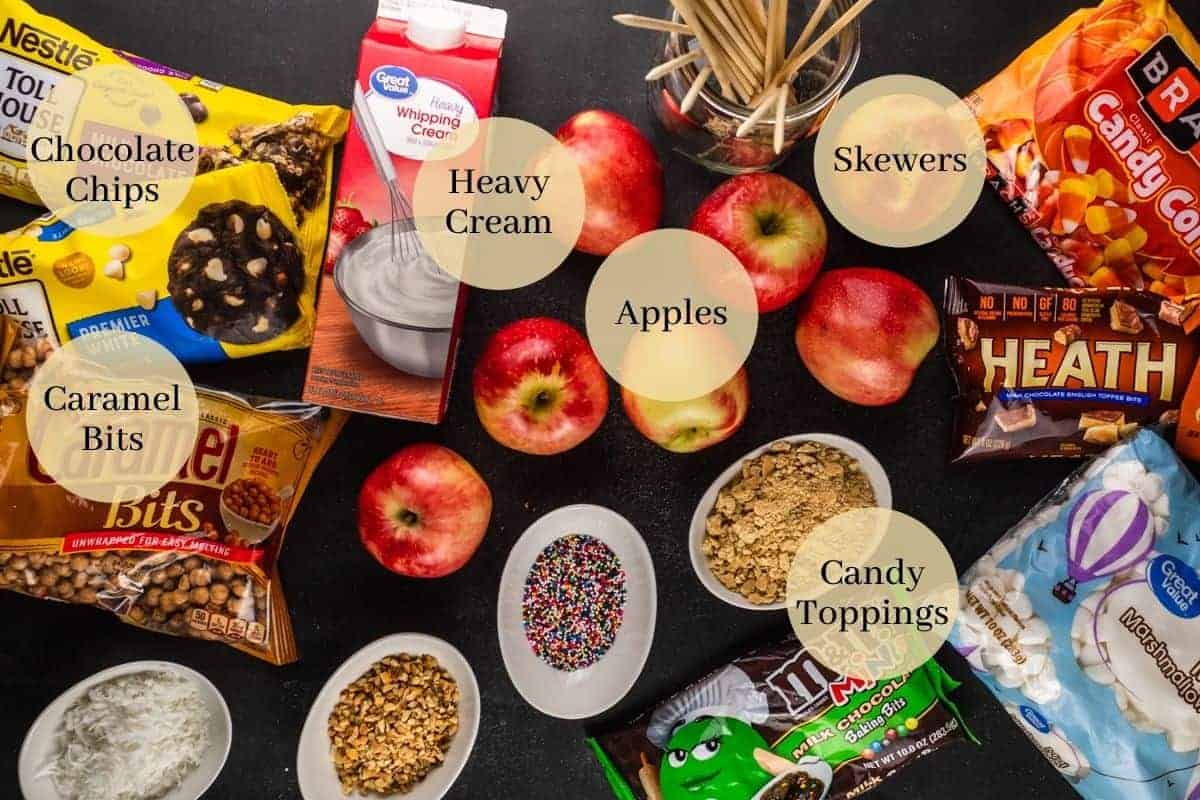
- Apples - Choose your favorite apple variety for this caramel apple bar. Granny smith, Fuji or Gala apples are some of our favorites. For that perfect sweet and tart combination, I recommend using Granny Smith apples.
- Sauces - I like serving both milk and white chocolate dippings sauces in addition to the caramel. If you don't want to make the sauces, you can buy pre-made dips from the grocery store instead.
- Toppings - There are so many different candy toppings that you can offer. I have listed some of my favorites, but you can choose what you and your guests would like the best. I suggest selecting toppings that are relatively small so they easily stick.
📋 Substitutions and variations
- Apple Nachos - Instead of placing the apple slices on skewers, they can be served in a bowl or on a platter instead. Guests can arrange apple slices on plates and top them with the different sauces and toppings; just like nachos! To make it easier for serving, put the caramel and chocolate sauces in squeeze bottles.
🔪 Step by step instructions
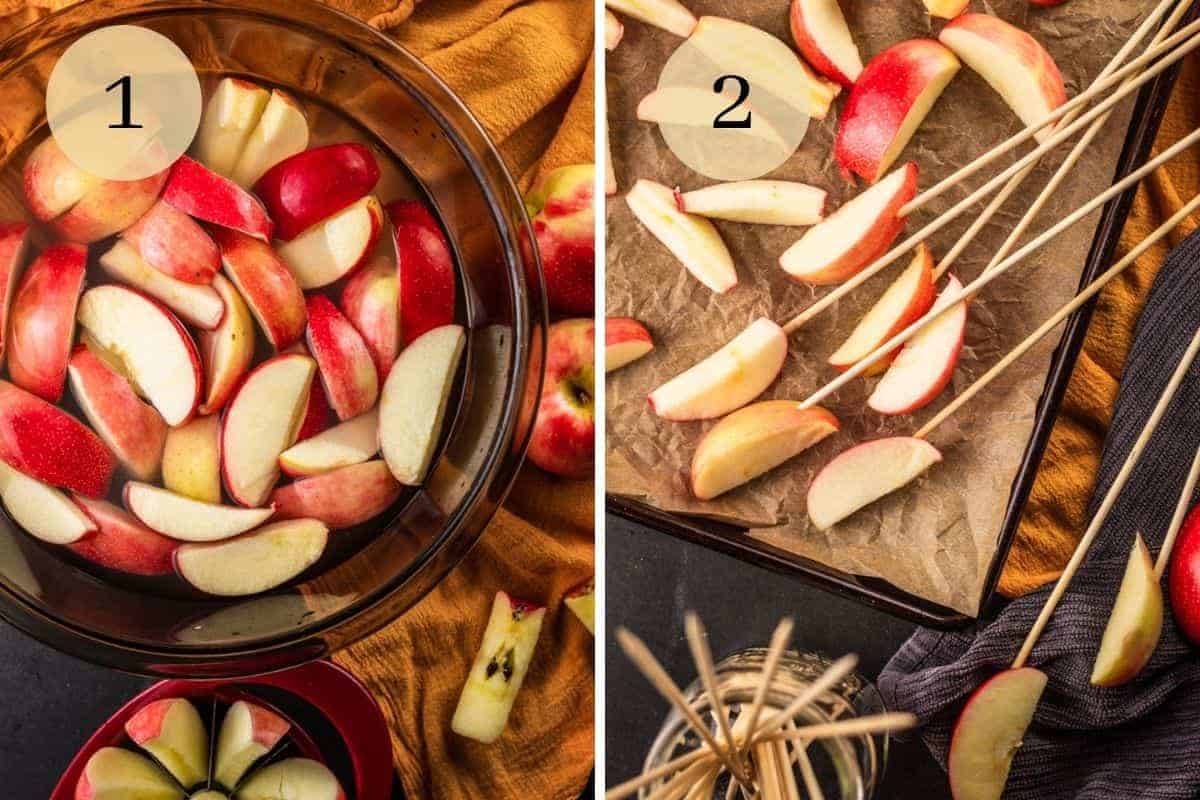
Core and slice each apple into 8 slices. Place the apple slices in a large bowl with the water and lemon juice for 5 minutes to help prevent browning.
Remove the apples from the water, rinse them off and pat them dry. Place the apple slices on bamboo skewers or lollipop sticks and set them aside on a baking sheet lined with parchment paper.
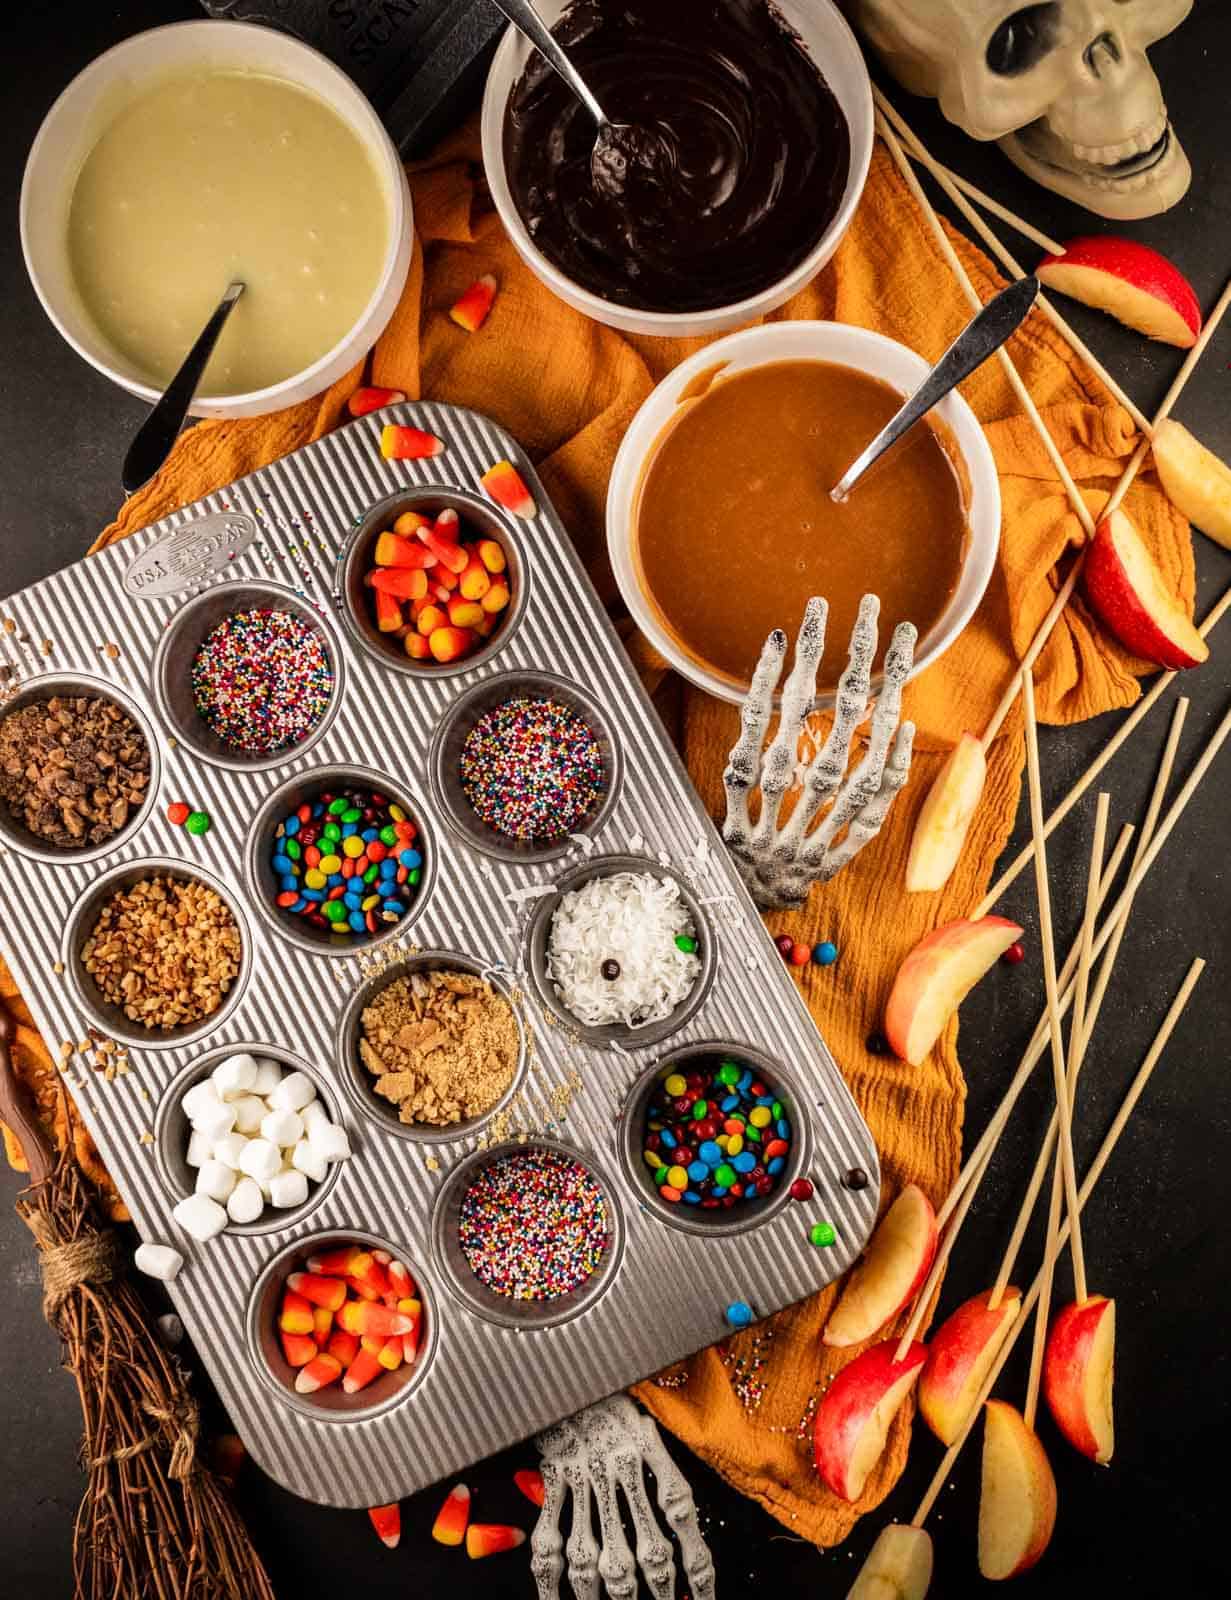
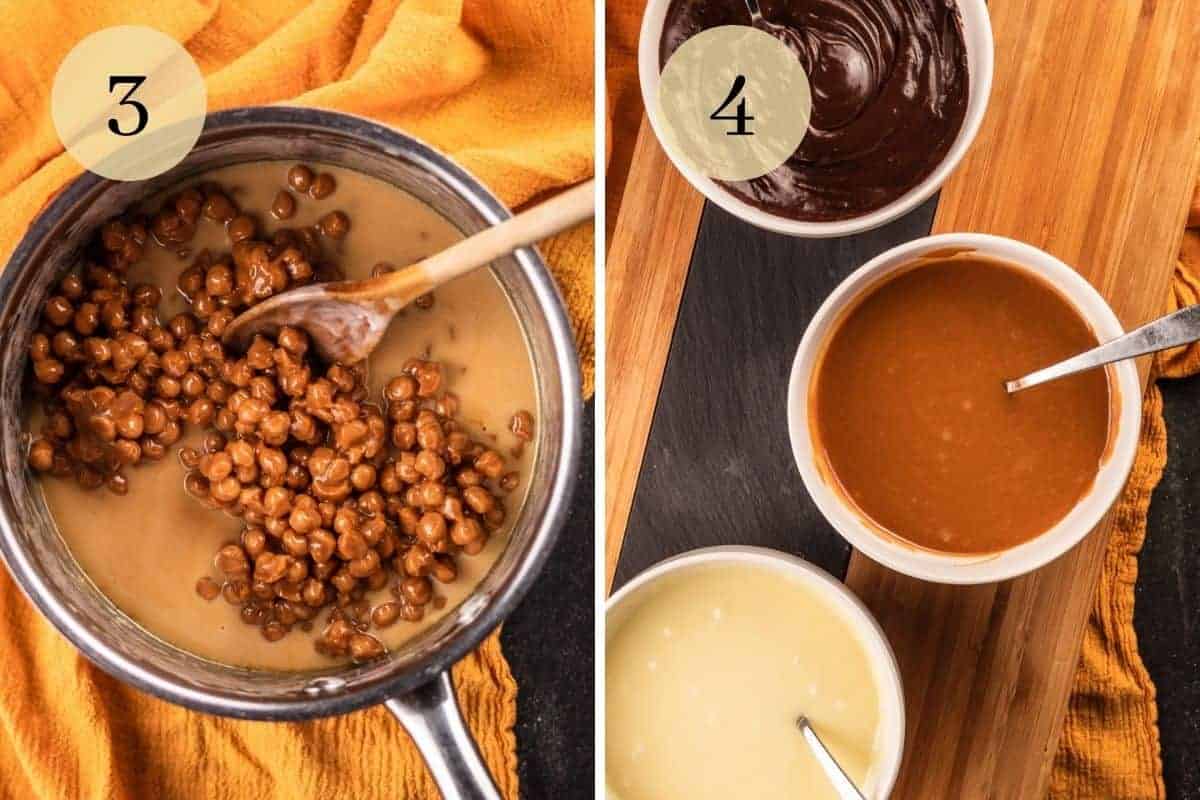
Combine ½ cup of the heavy cream in a pot on the stovetop with the caramel bits. Heat on medium low, stirring frequently, until all of the bits are melted into a smooth caramel sauce. Remove from the heat and pour into a bowl or container for serving.
Repeat with the milk chocolate chips and white chocolate chips until all three dipping sauces are completed.
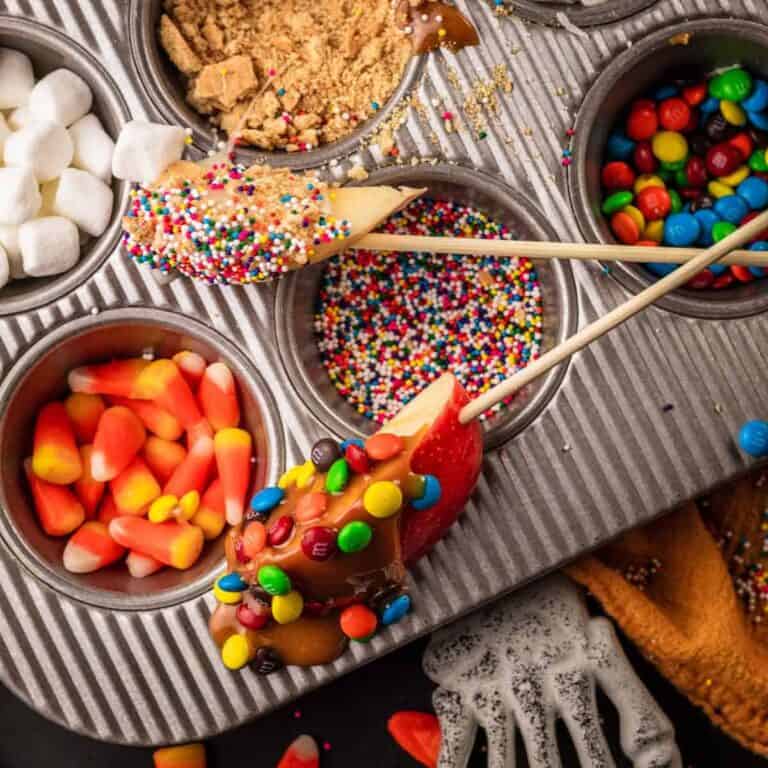
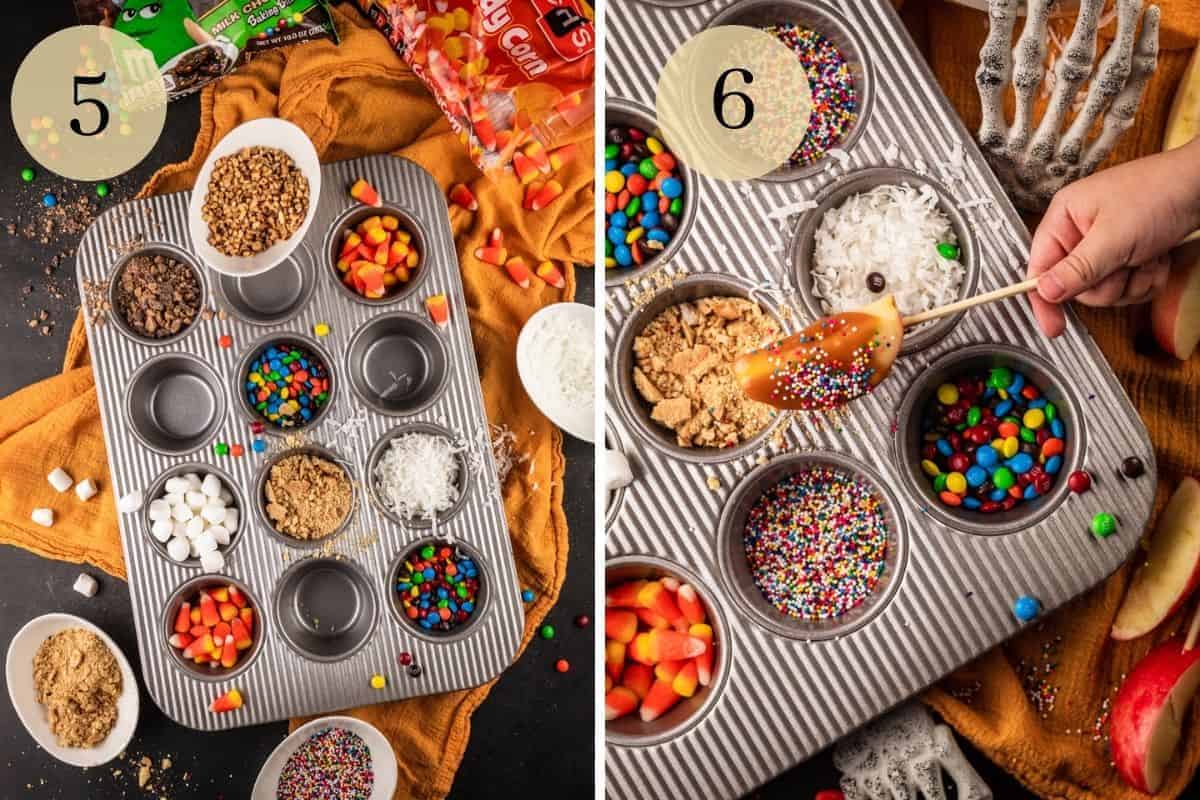
Place all of the candy toppings into small bowls or containers. Allow the guests to dip the apple slices into the different dipping sauces and mix and match the toppings.
If you ever don't recognize a tool or skill that is mentioned, be sure to look it up in our Glossary of Cooking Terms and Definitions for more information.
⭐ Expert tips
- Soaking the apple slices in the lemon water helps to prevent them from browning. Make sure to pat them dry afterwards so the dipping sauces and candy will stick to them.
- Heat the heavy cream and chocolate chips over medium low heat and then stir frequently to make sure the chocolate doesn't burn. Remove it off of the heat just before all of the chips are melted and continue to stir until smooth.
- Serve candy toppings with small spoons so people can pour the toppings onto the apples instead of dipping them. This will help make sure the candy doesn't get messy with caramel or chocolate. I like using a muffin tin to put all of the toppings into for easy serving!
🍽 Serving suggestions
Containers - Serve the dipping sauces in heat proof containers such as ceramic bowls, baking dishes or wide mouth mason jars. The sauces will stay warm enough like this for about 45 minutes to an hour. They can be popped in the microwave for 15-30 seconds to reheat if needed.
Crock Pot - For a longer time period, place an inch of water in a crock pot on low heat and then add the dips in mason jars to the water. Make sure to check the water periodically and add to it, if needed.
Heating Pad - Place a heating pad covered in a towel or tablecloth under the bowls of the dipping sauces to help them stay warm through serving time.
⏲️ Make ahead instructions
Apples - Slice the apples, soak them in the lemon water, pat them dry and then skewer them 1-2 hours ahead of time. Store them on a sheet pan wrapped in plastic wrap in the refrigerator.
Sauces - Prepare the sauces up to 2 days ahead of time. Cool them completely and then store in an airtight container in the refrigerator. Reheat in a small pot over low heat on the stove top, stirring frequently, until they are warm enough for dipping.
🍁 More fall desserts
If you loved learning how to make this fun DIY sliced caramel apple bar, then out these other fall desserts that I know you will love too!
- Caramel Apple Sundaes
- Pumpkin Roll with Mascarpone
- Apple Cinnamon Rolls with Caramel Frosting
- Pumpkin Chocolate Chip Bread
📖 Recipe

How to Make a Fun DIY Sliced Caramel Apple Bar
Ingredients
Sliced Apple Skewers
- 10 large apples granny smith, fuji or gala
- 4 cups water
- ¼ cup lemon juice
- 1 package bamboo skewers or lollipop sticks
Dipping Sauces
- 1 ½ cups heavy cream
- 11 ounces caramel bits
- 11 ounces milk chocolate chips
- 11 ounces white chocolate chips
Candy Toppings
- chopped nuts
- crushed graham crackers
- mini marshmallows
- shredded coconut flakes
- crushed toffee bits
- mini chocolate candies
- sprinkles
- candy corn
Instructions
Sliced Apple Skewers
- Core and cut each apple in 8 slices and place in a large bowl with the water and lemon juice. Let the apples soak in the lemon water for 5 minutes to help prevent browning.
- Drain the water from the apples, pat them dry and place each slice on a skewer.
Dipping Sauces
- In a small pot, combine the caramel bits with ½ cup of the heavy cream. Heat over medium low heat on the stovetop, stirring frequently, until the caramel bits are almost completely melted. Do not allow the mixture to boil.
- Remove from the heat and continue to whisk into a smooth sauce. Pour into a heat proof serving bowl or container.
- Repeat with the milk chocolate chips and then the white chocolate chips to complete all three dipping sauces.
Caramel Apple Bar
- Place each of the candy toppings into shallow bowls, plates or muffin tin.
- Set out the dipping sauces with the toppings and the sliced apple skewers. Dip the apple slices into the different dipping sauces and mix and match the toppings.
Notes
- Apples - Choose any variety of apples for the caramel apple bar. Use sweet or tart apples or a combination of both! Granny smith will give the perfect sweet and tart combination.
- Sauces - Pre-made dips can be purchased from the grocery store.
- Containers - Serve the dipping sauces in heat proof bowls or containers such as ceramic bowls, baking dishes or wide mouth mason jars. The sauces will stay soft enough for dipping like this for about 45 minutes to an hour. Heat in the microwave for 15-30 seconds, if needed.
- Heating Pad - Place a heating pad covered in a towel or tablecloth under the bowls of the dipping sauces to help them stay warm during serving time.
- Crock Pot - For a longer time period, place an inch of water in a crock pot on low heat and then add the dips in mason jars to the water. Make sure to check the water periodically and add to it, if needed.
- Toppings - Select candy pieces that are smaller so they easily stick to the apples. Serve with small spoons so people can pour the toppings onto the dipped apples to avoid too much mess.
- Apple Nachos - Serve apple slices in a bowl or on a platter. Guests can place arrange the apple slices on plates and top them with the different sauces and toppings, just like nachos! For easy serve, put sauces in squeeze bottles.
- Make Ahead - Slice the apples, soak them in the lemon water, pat them dry and then skewer them 1-2 hours ahead of time. Store them on a sheet pan wrapped in plastic wrap in the refrigerator. Prepare the sauces up to 2 days ahead of time. Cool them completely and then store in an airtight container in the refrigerator. Reheat in a small pot over low heat on the stove top, stirring frequently, until they are warm enough for dipping.

Lily Kershaw
I absolutely LOVED the caramel apple nachos idea at the end of your post! Typically when we've done caramel apples in the past it just creates a sticky mess everywhere. But the nachos were easy to make and relatively mess-free! I think this is the start of a new fall tradition in my house.
Amanda
Awesome Lily! So happy to hear that.
Melissa
The most adorable idea and my kids loved this! It is perfect for halloween, but honestly, when are caramel apples not fun to have? Whenever we have made caramel apples it seems to turn into a big gloopy mess, but just doing the slices seemed more manageable for the younger kids. I would definitely recommend this the next time you want a fun dessert activity.
Amanda
Haha, so true! Caramel apples any time!
Gina E
How long does the caramel stay liquified?
Amanda | Saporito Kitchen
The caramel should stay pretty liquified for about an hour. When I serve it in mason jars, if it starts to get too hard, I just place the jar in a bowl of hot water and that helps it soften back up.